Showing posts with label furniture. Show all posts

Wednesday, March 20, 2013

Arles Nightstand


One Man's Trash.....

A few months ago I found this little nightstand at the local thrift store. I was with a friend who spotted it first but kept walking because she felt it was priced to high ($10). She felt it was too beat up and even tried to barter without luck. I figured "what the heck", at the very least I can practice my ASCP skills without regrets and home we went (me, my friend and the nightstand).


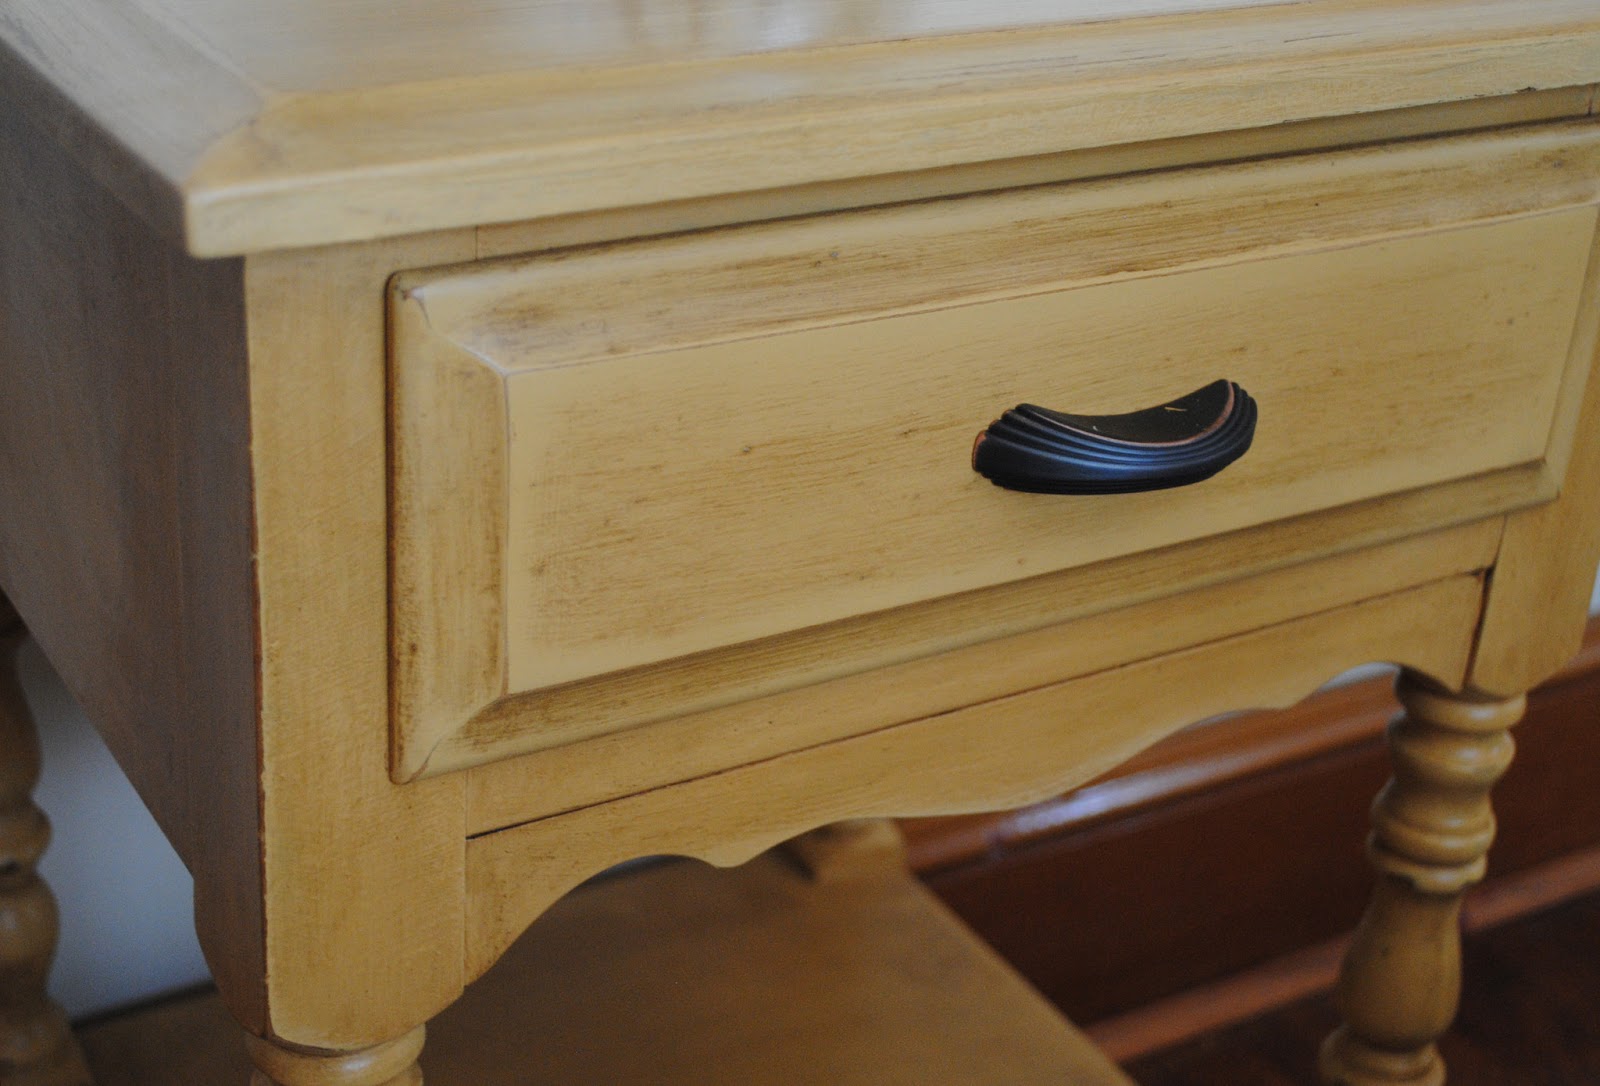
I had recently purchase ASCP in Arles to refinish a little rocker for Lucy (HERE) and had a lot left over so the color choice was made. Sorry, I only took one (pretty bad) photograph before sanding and staining.


I did a very light sanding to bring the contrast between the rounded shape of the spindle legs and the more angular top and base.


I just love the color contrast too. The dark wax (AS Dark Wax) and the wood that peeked though from sanding make the color more vibrant. I also like the new handle. Gives it a more modern vibe.


Thanks for visiting
Oh yea......I made a deal with Chloe. I promised her that if she stayed out of the pictures I would post a picture of just her. Isn't she just the most beautiful little girl. 

March 25, 2013*************************************
 UPDATE: The little ASCP Night Stand was featured on The Vintage Barn "Motivate Me Monday - Creative Party". Thanks and Hugs to Julie! Love your blog!!!
The Vintage Barn

Saturday, March 16, 2013

Mod Coffee Table


I just love it when I scratch something off my to-do list. Today I finished one of those projects that started out seeming easy but ended up taking much longer than expected. 

Here is the before & after of my Modern Coffee Table


I found this little table looking pretty sick but with good bones (and for only $10) and decided to enhance its modern design. The delay was directly related to my need to try new techniques. I wanted this table to have a modern flare and decided to spray paint the base and legs and strip and finish the top. 
 I first spray painted the base and legs with Zinsser Cover Stain Primer followed by numerous coats of Rust-Oleum Semi-Gloss in Black (light sanding between coats).  


While the base and legs dried I sanded and stained the top. This is where I ran into trouble. The first time I sanded I did not get all the way down to the original wood and it really showed once I stained it. I tried to cover the imperfections with a darker stain but it ended up too dark to sit over a black base and it some of the old oil bleeds from the wood still came through.One area actually looked like a hand print and I swear it was not mine.
 

 So, I waited for a warm day (last Sunday) and striped and sanded the top again. This time I got down to the base wood and when I reapplied the stain it looked beautiful. 
I know, I know...its all in the prep. Ok, lesson learned. 
I stained the top with Rust-Olean's American Walnut and protected this awesome finish with Polyacrylic. And here she is restored with a touch of MOD!


Thanks for visiting!
 P.S. You can find the tutorial for the Mercury Glass Vase HERE

Friday, March 15, 2013

Porch Table

Happy Friday. I have been buried in paperwork today but slipped in time to post my latest project. I found this little table two summers ago and have used it during the warm seasons for my plants. I purchased a small jar of ASCP in Emperor's Silk and wanted to try it out on more than one project so I only painted the top and bottom shelf. The color was very bright so I waxed it with AS Dark Wax which worked beautifully. Its a little too cold for my plants to be moved outside yet so I staged the table for the photograph. Can't wait to move all my green girls out there...come on Spring!!

BEFORE                                                  AFTER

Thanks for visiting

Saturday, March 9, 2013

Turquoise Bench

Just a quick "Hello" on this beautiful and very sunny Saturday. 
I hope you all are enjoying whatever the day has offered. 

Below is my very first piece of furniture ever purchased from a thrift store with a redo in mind. I bought it last spring and it somehow ended up tucked under another piece that is waiting for restoration. When doing an inventory of the stuff on my "to do" list I found it all dusty, wobbly, and unloved. At this time I am working on three other pieces but just had to stop and do something with this little treasure. I also had several cans of spray paint (also from last summer) that I wanted to use and the birth of the Turquoise Bench began. After I spray painted with primer followed by the turquoise I stained with the wipe-on/wipe-off method to tone down the brightness. I had the fabric hanging around and it was a match. Not bad ay?

BEFORE:


AFTER:


Thanks for visiting,


Friday, March 1, 2013

Vanity Chair

I have had this chair since the summer. I literally bought it as it was being unloaded from a woman's truck to the front of the thrift store. I was with my daughter and we were looking for a shelf for Lucy's books and from the road saw some and pulled in. The woman who donated the shelves was still unloading. I bought this chair and the matching vanity (desk) and night stand. The desk's future is still to be decided and I redid the night stand to be a plant table (photograph at the end of this post). 

On the bottom of the chair was stamped:
GEO. FENNEL 
MT. VERNON N
 Through a web search I found the furniture company from which the chair was purchased:
 George Fennell & Company, of Mount Vernon, NY established 1901.
..along with several advertisements that where published in local newspapers over the years. Check out the prices. 
  
This advertisement was published in 1907....


This one was published in 1945. The article found within the advertisement is very indicative of the times. The country was at war and the company used the idealism of the nation's state of mind to market their furniture. I found the adjective "post-war" interesting. 

Note of Interest: My father was a World War II veteran and on the date this paper was published it was his 23rd birthday and he was most likely in one of the "far-away battlefields", dreaming of peace and a joyous homecoming. He did come home and lived to the fine age of 90. 

So, on with the story of this little chair. I pondered paint versus stain. After discovering the history of the furniture company I thought maybe I should restore the wood to its original state. To help me make the decision I painted part of the chair and sat with it for awhile. I liked the chair with color so...decision made.  


To come up with a color I mixed several samples left over from other projects.  It came out a pinkish color so I went with it. I also wanted to use chalk paint so I mixed the paint with nonsanded grout as instructed on DIY-CHALK-PAINT-RECIPES from "In My Own Style"  

After the paint dried I did a little antiquing......


and staining...

...but something was just not right. 
The little chair seemed to need something that matched its already special design. 
And then it came to me...

.
.
.
.
.
.
.
.
.
.
.
.
.
.
.
.
.
.
.
.
.
.
.
.
.
.
.
.
.
.
.
.
.
.
.
.

 I taped off stripes with painter's tape and painted them with the chalk paint.  
(sorry, I go so excited I forgot to take any pictures)

 To make sure this little chair can take the ware and tear of a child 
I finished with four coats of minwax polycrylic and..... 

Voila!


Thanks for visiting,
This Project Was Featured on...