Showing posts with label Decor. Show all posts

Sunday, July 14, 2013

Beachy Basket Door Decor


I'm back! I can't believe I haven’t posted since last week and no, I have not been on vacation. The truth is that when the weather is warm I tend to spend more time outside in the garden and less time inside on the computer (a good thing I think). 


If you’re familiar with East Coast summers you know that once the humidity hits, working outside is not enjoyable, so while it's still bearable, I’ve been outside rolling the mulch (LOL).  According to the local weather forecast it seems our hot-humid dog days of summer are here so I now have more time to get back to blogging. 

While we are not taking any official summer vacations this year we are doing some weekend getaways and next weekend we will be going to the beach. Keeping within this mindset I decided my front door needed something different, something beachy. 


I found a little basket at the thrifts store and turned it into a welcoming decoration with a beach theme. I hope you enjoy this tutorial and as always…Enjoy!


Supplies: Silk flower, Starfish, Floral Foam, Floral Wire, Ribbon, Glue Gun and the Basket...


I started by gluing the floral foam to the bottom of the basket.
 

 I then separated the leaves from the flowers and attached them to floral wire. This is so I have more control over their placement in the arrangement.


 Then I started the arrangement by starting with the yellow flowers, then the turquoise flowers, then the blue flowers. The filled in with the leaves as needed.


 To add the starfish to the arrangement I first hot glued them to flower wire...


...and then, the Bow:

 And here is the finished piece hanging on it new home!


 Thanks for visiting,

Wednesday, May 15, 2013

Bathroom Valance

For some reason this past weekend I was full of energy. I have no idea were this spurt came from but I took full advantage of it and worked on several projects that I had been putting off for a while. One of the things that I have been wanting to do was make a valance for our bathroom. The one that was there was Okay but a little boring. I wanted something with a little more pizazz so I bought this fabric from Joanne's and used the old valance as the pattern. The only changes I made were to make it a little wider. I also added interest by using solid black grosgrain ribbon for the ties. Enjoy!


Thanks for Visiting,

Thursday, April 18, 2013

"Let's Vase It" Series - #3, Mother's Day Keepsake Vase

I know, I know, another vase. For some reason all of my craft ideas are for vases. I assume this will pass but for now I am just enjoying the ride. 

Here is my Mother's Day Keepsake Vase


This project was made with a;
  • Dollar Store Vase
  • Photographs printed on regular printer paper
  • Spray glue
  • Modpodge
  • Clear satin spray paint

First I found pictures of my first three children when they were between the ages of 2 and 5. I had them just a few years apart so it was like having triplets. Those memories are priceless. Because these pictures were taken in the pre-digital camera era I had to actually take a picture of the photographs and then edit a bit to get out the graininess. During the edit process I was also able to crop them to the size I needed to fill the spaces on the vase. I also printed them all out as black and white. This helped to improve the quality a bit.


 Next step was to spray the dollar store vase with glue.


 Then I began to place the pictures on the vase in random patterns. I had to return to the printer a few times to tweak the sizes of some of the pictures so that they fit. As you can see there are still some areas of the vase that are not covered with pictures. The spray glue gave the glass a frosted look, which I liked and wanted to show through a bit so it worked out well. 


 Once all the pictures were stuck down I painted two layers of ModPodge over the entire vase followed by a coat of satin clear coat. 

 
Add flowers and you have a great gift for Mom!


Thanks for visiting,
 
 update: 4/26/13
This project was featured on Craftionary's Friday Link Party.

craftionary

update: 4/29/13
This project was also featured on Huckleberry Love, Much Ado About Monday Linky Party.

Wednesday, April 17, 2013

"Let's Vase It" Series - #2, Faux Milk Glass Vases

A quick hello on this wonderful Wednesday. 

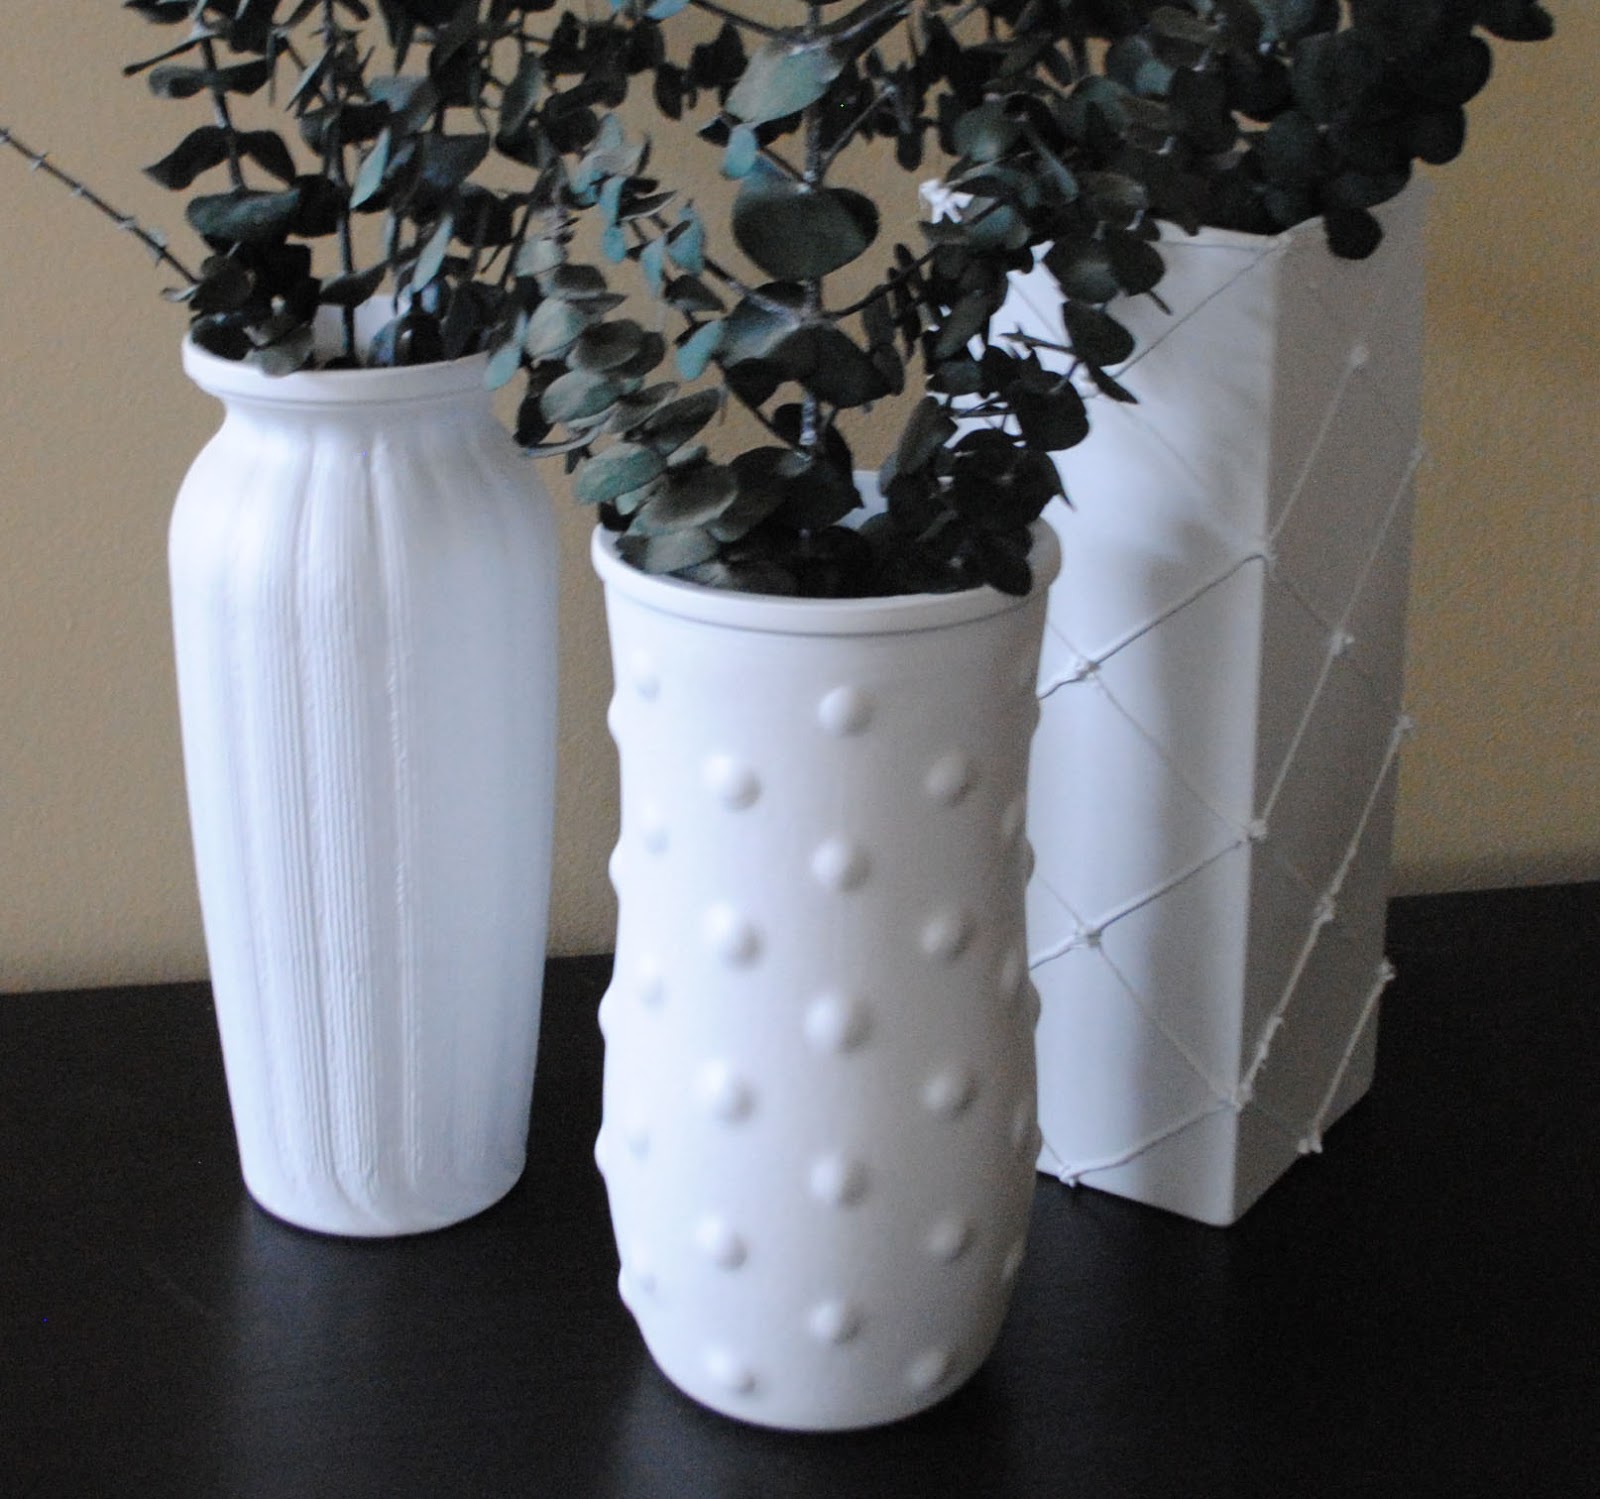
I just love Milk Glass, especially vases. I picked up a few glass vases at the local thrift store and turned them into faux milk glass with a coat of primer and a coat of flat white spray paint. Placed together they make a wonderful arrangement.

Enjoy!


Thanks for visiting, 


Wednesday, April 10, 2013

Trash to Treasure Lamp

Happy Wednesday. God has blessed me with a good and busy week so far. I have so many projects in progress but time is just not allowing me to complete them as fast as I want. I did finish one small project that I want to share with you. 


I found both the lamp base ($5) and the shade ($5) at the thrift store (different times of course). I spray painted the lamp base first with a primer and then with several coats of silver. The shade had been donated from the local Target and still had the plastic wrap and price tag on it, (hence the high price of $5 instead of the everyday $3 price of shades LOL). I needed a lamp with some class in the spare bedroom/office/library/dressing room...yes we use that room for everything. Obviously we have not figured out what to use this room for but I just might use this lamp as a basis for the rest of the decor. Not bad for $10 huh? Enjoy!

BEFORE

DURING
AFTER

Thanks for Visiting,

4/17/13
UPDATE: This project was featured on Handy Man, Crafty Woman!


Tuesday, April 9, 2013

DIY - C&B Vase

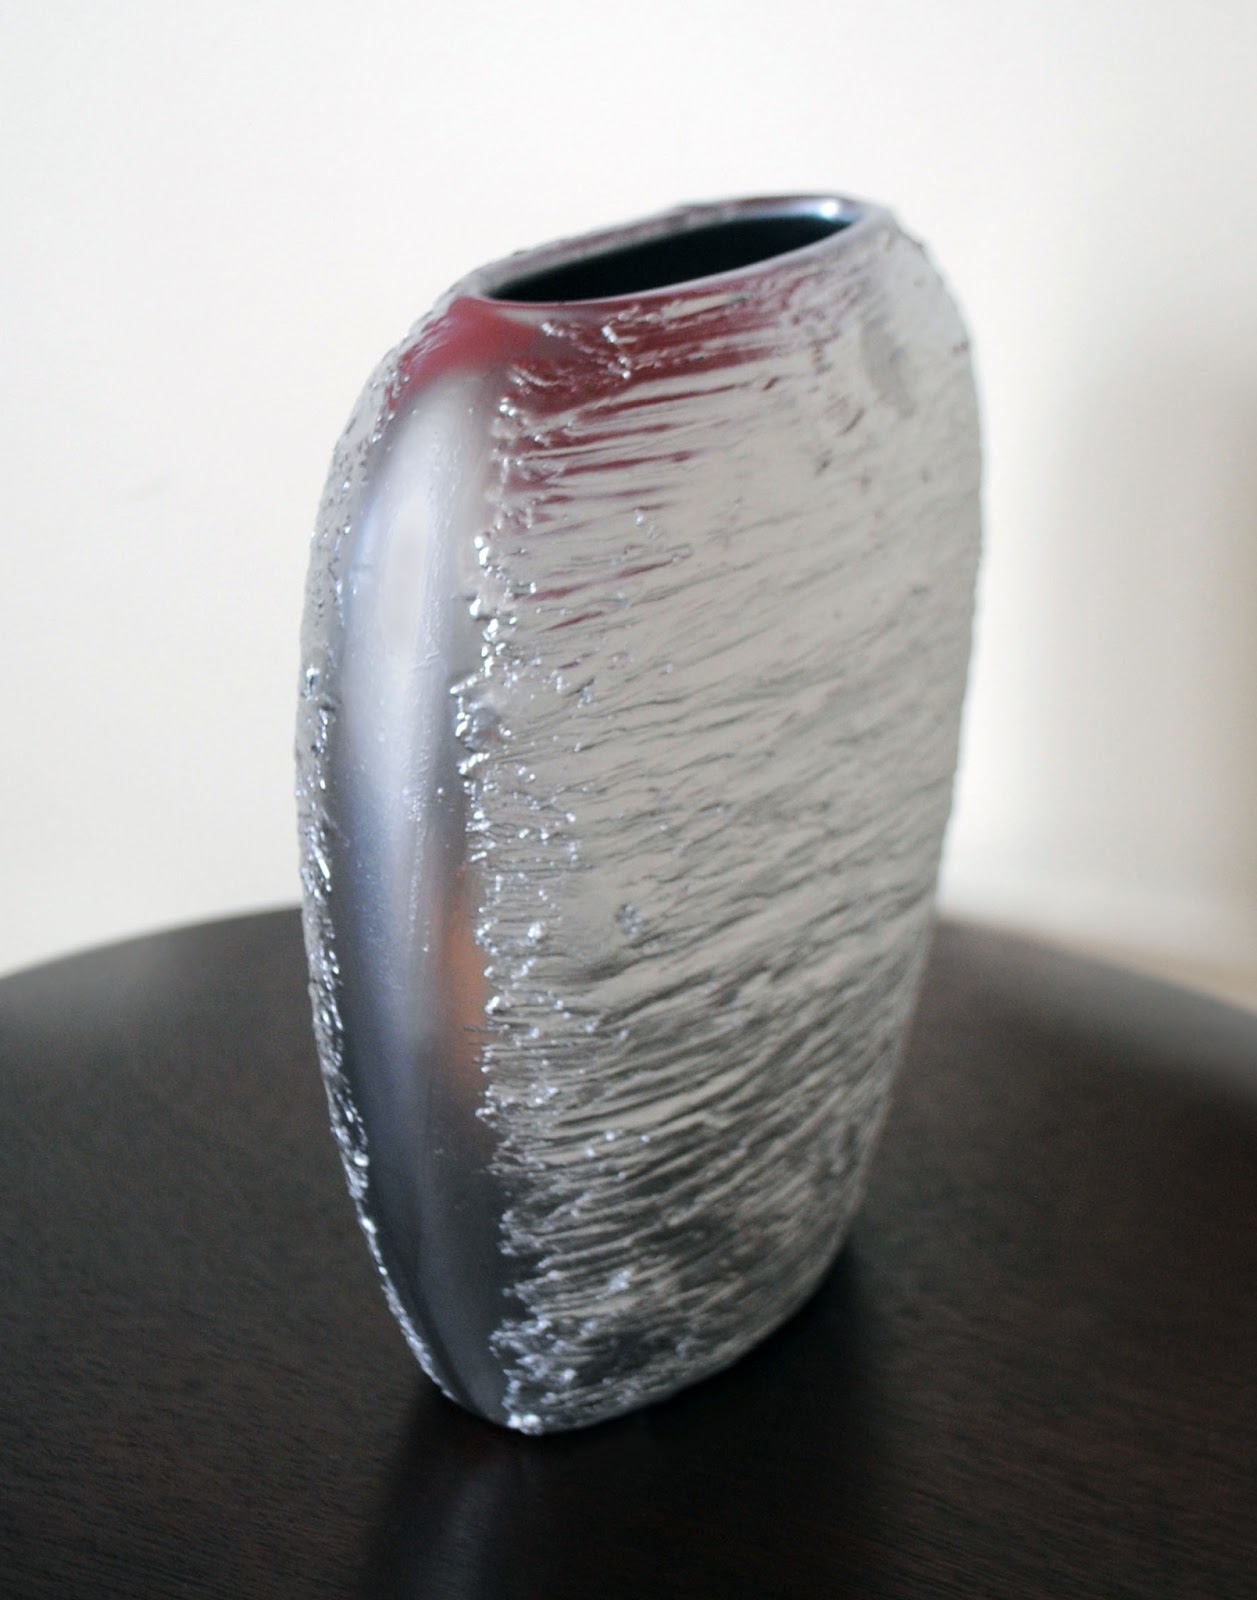
I just love Crate & Barrel. We are lucky enough to have a store very close to home and I love to go in and brows. I have to confess though, I have only purchased one thing there and it was with a gift card we received as a wedding present. (see pic below and Thanks again Sue). So imagine my delight when I came across a vase that had DIY potential. It took a while to locate just the right thrift store vase that was similar. That day came last Friday and that $6 vase became my DIY C&B Vase....and I absolutely love it. Enjoy!

You will need.....
          • A Vase

                               and Supplies;

1. First I sprayed the vase with the primer. I like to use spray primer when possible as it gives a smoother finish.


2(a). Once the primer was dry I used a gloved hand to apply the spackling. I used my fingers to spread it in horizontal lines.


2(b). To achieve the same look as the C&B inspirational vase, I made sure that the sides of the vase were not covered with the spackling.


3. Next I took a stiff dry craft brush and began dragging it horizontally across both the front and back making sure not to get any spackling on the sides. I went back over this several times until I achieved the look I wanted. I made sure to blot the brush on a paper towel so it stayed as dry as possible.


Here is the "after" photo before it was completely dry. I used the spackling that was pink and dried white to ensure that I did not get any of it on the sides.


4. After the spackling was completely dry (it took about 24 hours b/c it was thick), I sprayed several coats of Rust-Oleum Metallic Spray Paint in Silver. Here is the finished project...


I know its not exactly the same but I like the way it turned out. It's a hand-made original.

Thanks for visiting,

 Oh yea...here is what I bought with my C&B gift card.

4/12/13
UPDATE: This project was selected and featured on Knock Off Decor!


4/16/13
UPDATE: This project was selected and featured on Romance on a Dime's Take it on Tuesday Linky Party. Thanks Betsy!!!


RomanceOnADime.com


5/10/13
UPDATE: This project was featured on The Power of Paint. Thanks!!!