Sunday, September 2, 2012

My Talented Niece

It just dawned on me that it would be a crime not to share some of the amazing pictures that my niece has taken of my daughter and granddaughter. She is extremely talented and her work is amazing. See for yourself and follow her on Facebook or her website Photography by mj.


Cakes for Hugs!

When I was younger I made wedding cakes for profit. Now I just make them for hugs. 
Here are a few recent cakes I have made;

My wedding cake
My daughter (and granddaughter's) baby shower cake
My granddaughter's Christening cake
My Mom's 90'th Birthday Cake


Just had to post a photo of my amazing mom. An example of clean livin' :)

For my granddaughters 1st birthday

Lucy

OK...I have to introduce you to my gorgeous granddaughter LUCY (and a project I did for her).

My daughter Mallory (click here for her blog) is a new photographer and has used Lucy to practice....I have so many great photographs. A Nana's dream come true. 

Below are photo's taken by Mommy of Lucy and Nana (me) at playtime. We had a blast.


And my latest project for Lucy (and Nana).......


This is in a very small entry foyer off the back of the kitchen so I figured I would do something fun with the space. If you look above the chalkboard you will see the seating chart from our wedding that I framed. I also love the color, not one I would put anywhere else in the house but perfect for this little entry way.

The Wedding


So as I was pondering past projects done around the house I remembered that before I started changing the interior landscape of my home I worked for about a year on projects for my wedding and reception. I made just about everything from the programs, to the centerpieces, to my head peace to the cake. Here are some photos of those things. 

rhinestones glued onto the bottom of my shoes

The wedding program...all made by hand. Lots of paper, lots of hole punching and ribbon tying while watching TV (thanks Mom) and lots of rubber cement. The inside had a photograph and small bio for each person in the wedding. There was even a bride and groom trivia crossword puzzle inside for the guests to do while they waited for the wedding to start. We handed out orange monogrammed pencils too.

Guest gifts...corn bread mix that we called "Wedding Corn Bread". The direction are under the lid.

The cake....my first time working with gum paste.

Setting up the entrance table. Instead of a guest book I made message cards that could be filled out by the guest and placed in the album (left of the plates) along with pictures from the disposable cameras that were on each table. The cards are in the wagon in front of our picture. The bowl is filled with little chocolate bars with wedding themed wrappers that I ordered online The votives and vase are covered in gold leaf flakes (a really fun project).

Items at each place setting included a little bag of candy, a box of nuts, and the menu. The venue did a great job folding the napkins.


The head headpiece


The finished product. If you look closely you can see the table names jetting out from the center of the arrangement. Each table was named after a place that we visited while dating. The table above was entitled San Antonio Texas. The photo to the left is from our visit to Disney in Orlando Florida. I made a board (word program and printed at Kinkos) that listed all the guests under the name of the table they were assigned and placed it outside of the ballroom's entrance on an easel.


The head table...I created the large center piece and I bought the small ones as is and the candles at Michael's Craft store. I rented the gold chiavari chairs, table overlays, and napkins from a local party rental store.

Love the American Bungalow

I absolutely love the American Bungalow. It is by far my favorite house style. When I am in California visiting my son we often spend Sundays touring open homes. Below are pictures from our last adventure.


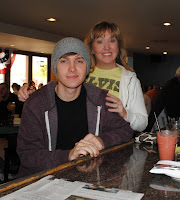
Me and my son at lunch after our home tour

Saturday, September 1, 2012

The End of Summer (and our garden)

Labor day marks the end of summer for most but in our house the end of summer is marked by the start of turning over our garden. This was a very hot summer and our harvest was not as good as last year but I did get enough tomatoes to can a few. I also tried my hand at canning pickles and salsa. The pickles will be pickled in a few more weeks so we will see.

Our garden at the beginning of the season. In retrospect we planted things a little too close and I only needed two cucumbers...three was overwhelming.


I also decided a few weeks back that we needed a bigger garden for next year and started working on edging the new space. Below is my work in progress.


Here is what our first garden looked like.....so tiny but the cucumbers where gigantic.


I thought the cucumbers where so large because of the trellis I build (below) but later I figured out it was the type of plant I panted. If you want cucumbers that are long and tapered I recommend Chef Jeff's "Burpless" and if you want ones that are good for pickling I recommend Chef Jeff's Bush Pickles


I also recommend using a trellis. I build mine out of garden stakes, screws, and wire but you can also purchase one from Gardeners Supply Company


One last thing I did during our garden turnover was to replant the hot peppers into a planter and move to the deck. The red pepper plant it so pretty, I wanted it to live out the rest of the season in a place where we could see it easily and everyday. Unfortunately I don't know if this was the plant I bought at the garden center or the one that my father-in-law gave me. I plan on moving it inside this winter to see if it will continue to grow. Worth a try don't you think?


DIY Faux Stainless Steel Dishwasher

I have done a lot of updates inside and out of our home. This weekend I covered my 1990's almond colored dishwasher (still works) with Faux Stainless Steel film.


First I taped off the control panel and spray painted it with black satin spray paint.


Next I searched for the Faux Stainless Steel film and found it online at Ez Faux Decor


When the film finally came in I gathered all the supplies; basically a spray bottle with water, a blow dryer, a squeegee (I made mine by taping painters tape to a plastic drywall knife), scissors, and a razor blade. I have to admit this was pretty hard, just like trying to put really thick contact paper on a vertical object. There are quit a few imperfections that you can see close up but not really noticeable from a regular stance. If I were to do it again I would have someone standing close with the blow dryer turned on the entire time. Doing it myself, I had to blow the heat and then set down the blow dryer and smooth it out. Also, follow the instructions and smooth the film down from the center out, have several new razor blades handy, and don't expect perfection. I almost gave up but after numerous attempts it turned out alright. I'm pretty happy with the results and it will do until the dishwasher breaks and I can replace it with a brand new stainless steel one.


Not bad huh? Of course I am sitting on the kitchen floor to take the picture and you can see where the film didn't fill the space between the door and the bottom panel but unless I have guests who sit on my kitchen floor no one will ever know except me. 

Now...what the heck to do about those counter tops??

5/4/13 Update - It has been 8 months since I did this project and I just want to let you know that the faux stainless steal and spray painted top have held up perfectly. Absolutely NO issues or complaints here. I highly recommend the product but still suggest that you practice before and/or at least have someone standing by with the blow-dryer. I would do this again without reservation.